Yea, yea, real original name. But try finding a title for a blog on Blogger - they're all taken!
Anyway, I needed a place to integrate my other blogs that I only occasionally add to as well as a place to post random or occasional pics and info, etc. So here we are!

Sunday, August 5, 2007


Friday, April 20, 2007
From my GPS'ing Blog
Entry #1 - "GPS Receiver"
I didn't know what to call this blog as it will likely have a little something to do with all aspects of using GPS's, mapping, etc and probably lots of my own personal comments. GPS'ing seems as good a name as any...

I've always wanted a GPS receiver, but could never justify to myself the amount of money one costs versus their use, even though their price have come down a lot and continues to do so. I was checking used and new ones on eBay on and off for quite sometime.
One day one of my customers mentioned he'd trade me the brand new one he bought and that he had only taken it out of the box once, in exchange for putting an additional video card in his computer, setting up his software for it, etc. What the heck, I thought.
So I agreed after looking at it again (I played around with it before when he said he couldn't figure it out), it's a Magellan eXplorist 100 (Yahoogroups mailing list that covers it, in case you got one and are interested. They don't talk about the 100 much - maybe they consider it the mentally handicapped brother to the nicer models or something). Fairly basic, no maps but it does the job.
Reading info from the manufacturer's website - says that there is no computer interface built into it but some hackers found that there is a place for one, and a simple interface cable is all that's needed, this company makes them. This may be my next acquisition. Another website also shows how to make your own.
Nice device, well-made, looks fairly waterproof. It fits in my padded cellphone case real nicely, and a lanyard from a waterproof flashlight fits on it.
It shows routes and guides you back to waypoints, does 2000 waypoints, shows an odometer and pedometer/speedometer, has a compass of sorts (it depends on the satellite signal, it's not a real magnetic compass), has WAAS (for more accuracy), and pops up a message to tell you when you are close to your destination. Super geekalicious.
Just watch out in 2011 or so when solar flares are going to play hell with the GPS sats - story.
Wish thisone had the built-in roadmaps though but not missing it so far. Maybe someday I'll want a better one with the roadmaps (though I can't see myself saying "Tom-Tom, where the f*** am I?").
---
Entry #2 - "A little trip and playing around with the GPS receiver"
Well, got behind on this. I'll catch up with what I'm doing with the receiver a little at a time.
Once I received the receiver I hurried through as much work as I could do well in a short time and took a trip out onto the small trail I have cut through the woods, and played around with 'finding' my way back using the GPS receiver's trackback feature, marking waypoints, etc. A little something to get comfortable with it. Then it was back to work, I had a number of those small website-related things that seem tiny but take up an hour each.
Later in the day I had finished or nearly finished everything. I headed out and went into some no-man's land that I know the location of, that I've been wanting to get back out to. There's some interesting cliffs and natural formations out there so I thought I could gain a little experience in using the functions of the GPS receiver by waymarking them, amybe trying to find my way back, and also to have fun with plotting the interesting points I run across on USAPhotoMaps.
USAPhotoMaps is a great program for downloading Terraserver sat and aerial photos (including color sat ones of some major cities) and topographical maps, plot points and routes, etc, plus it can interface to a GPS.
Anyway, I started walking out in this no-man's land (it's not really, the owner just hasn't done anything with the land, due to it's inaccessibility and roughness, I would guess - lots of hunters and local people use it). As soon as I started walking out there I found a whole series of trails that someone had painstakingly cut through the area - they hadn't been there a few years ago when I went out there. I immediately started marking out the trail on the receiver and watching as the screen started showing where I had been and where the other parts of the trail was in relation to me. Very nice. Very geeky.
I then headed over toward the location of the cliffs I knew about. I had been over in this section a few years before, and walked along the cliffs until I could find a good place to climb them. This area is extremely dense with brush, and there's places where a person can't even walk - even bullying through the brush, and I had to walk back and forth in some locations to find a better path through this brush.
If you're not familiar with the denseness of the brush in some parts of the North Country of NY state it may be hard to imagine. Some people I've mentioned this to, even some who are avid outdoors-people, I think sometimes haven't ran across some of the bad areas that are almost impassable like this.
I remember once I was hiking and got into some brush that was extremely bad. I bulled my way in further and further but got to a point where I was walking on top of a layer of the brush below, because it was so thick and still pushing through more of it. It was like walking on a springboard or something. But at one point I couldn't go forward even with walking on top of the brush, for a panicked moment I couldn't go back or in any directions. Pretty bad.
Anyway, I didn't run into anything quite as bad on this trip, just a lot of dense stuff.
While walking through some moderately heavy brush I saw something through it. What looked like a domed building.
As I got closer I could see that it was a dense pack of vines. They must have started growing over a tree (the tree underneath was dead) and killed it, then kept growing over and over itself, creating a dome-shaped thing, which was hollow inside except for the rotting skeleton of a scrub tree. The inside would be hard to get to but it was less dense at the bottom, a natural shelter which could be enhanced with some bark, leaves, and wood on top, if so desired. There were also three or four more of them, but none as impressive or well-defined as the one in the photo at the right. Of course I waypointed it so I could find it again. I took off my backpack, hauled out the digital camcorder and got some videotape of these (see still capture from video at right- I didn't take shots with my regular digital camera on this trip, though of course I had it with me).
 Nearby was a large hill, looking like a giant had plopped down a chunk of limestone and dirt - which was so surrounded by vines and brush I had a hard time finding a side that I could climb (and it was fairly steep). This hill was partially on the windward side, which would protect the vines from the heavy windows blowing through this slightly higher elevation.
On top of the hill (again, marked on the GPS so I could return later) I could see in all directions, a large power line was nearby, and I could see the cliffs that were my destination, as well as a stand of Pine trees. I knew within a mile was another much large woods of them, but this was a small group near the foot of the other end of the cliffs.
I could also see some open space leading up to this area - I'd be able to mountain bike back here quicker then walking next time, with out much trouble (plus I could walk back this way, and still use my first waypoint as reference).
Looking over the edge of the hill I could see a brown plastic pail that someone had thrown over the edge. There didn't seem to be any other signs of tracks or anything, nearby on the leveler ground I had seen what looked like old ATV trails and, of course, the cut trails were behind me at this point. Why did someone come out here and go through dense brush to throw an old pail over a hill? I don't know.

The top was certainly a great spot and afforded a great view in 360 (you can see in the still capture the heavily-brushed valley that I was getting set to head across).
After a few quick videoshots from this location I descended and, after another look at the viney domes, I headed toward the cliffs. Passing over the stream that I knew ran through the lower elevation of the valley I could see how much it was used by local animals, the few game trails didn't do me too much good at this point. A lot of coyote poop everywhere, and occasional deer bones. There's a lot of deer and a lot of coyote around here.
I finally reached the cliffs. This was at a different location as when I had been here before a few years ago. I waypointed it and looked for a way to get up.
The cliffs here aren't real tall and I could climb them if I really wanted to take a few chances. I didn't, but I found a few places where the stone had fallen and climbed up enough to peek over the edge. Woods, blowing wind. Nice place to look around and relax but this trip was going to be a short one.
I stood at the foot of the cliffs for a moment. Geez, I hadn't told anyone or left a note of where I was going - something I never forgot to do. I was in such a hurry to try out the GPS I had forgotten. Never a good idea.
Some of the locals tell about seeing bear around here, and things like that. It may be pretty dense woods but it's surrounded by lots of civilization, and it's really not that large of a wilderness area, I doubt any bear would or could live here. Though they might be passing through. Fort Drum has a Black Bear population - a story was done on the Discovery Channel or Animal Planet recently. Despite the denseness there's not that much area right here; plenty of wildlife and food for smaller animals like coyote but probably not large and more aggressive stuff. Some locals to this little area say they see bear, lynx, and other stuff that probably are figments of their imaginations, like occasionally seeing UFO's and Bigfoot.
Anyway, I had accomplished what I was looking to do so I turned around and headed back, trying to find the same 'path' I had taken across the valley, or something easier - the dense brush was terrible here, catching my hat, my safety glasses/sunglasses, and any protruding piece of my backpack (like the hunting knife in easy reach on the side). Finally, after getting to a bit more clearer area and referring to my GPS I got back to the viney hill, and headed along the much-easier walking of the clear almost-fields. I made good time, traveling at 4.5 miles per hour or so according to the GPS. Yea, very geeky stuff.
At one point I came across a large sinkhole, looked like a group of woodchucks were using it for woodchuck city. I could have easily gotten inside the sinkhole, and after waypointing it and looking around, I couldn't find any others or even a sign of rock holes nearby.
I continued back, passing over a couple old stone fences and some signs of old wooden fences. Remembering looking at this area on the satellite map the signs of old fields could still be seen, though from the ground the definition of these property lines were hard to pick out.
Watching the GPS I headed back to the cut trails and caught up with one. On the way on another leg of the trails I found some surveying stakes.
Fun, wish I had more time for hiking and/or mountain biking.
After I got back I copied (gotta get that interface) all the waypoints and entered them into USAPhotMaps.

---
Entry #3 - "Geocaching"
I've been moderately interested in the idea of Geocaching (originally called something like "GPS Stash Hunt").
Basically, it's like a game - someone hides a cache somewhere and provides coordinates to others (usually over the Internet), who use their GPS receivers to find the general location of the cache, then usually search by sight for it. Some people really hide them in hard places to find, some caches are simpler to find, and some provide clues to finding other caches and are multi-legged hunts. They also have geocaching events, etc.
When a person finds a cache they may sign a logbook, log it on a website, leave something for the cache or take something and leave something in exchange. It's a little like a treasure hunt with symbolic "Treasures". Thousands of people all over the world do it, as well as clubs and organizations. There's also different twists on it and lots of "in-words" and phrases.
So I gave it a try. Not far away there are two caches, walking around in the woods with my wife and the dogs I found the coordinates but not the cache. Having written down the coordinates and converted them to the default latitude and longitude format my GPS showed - cut off a few decimals places, so I was kind searching a large area instead of pinpointing the location as much as I could have. Next time out I'd write down the full coordinates down to the last decimal.
A few days later I went back, taking my father along this time, and armed with the coords down to the last decimal. I walked around a bit, getting used to which directions to go to increase and decrease the latitude and longitude for a search pattern and pinpointing the exact place I want to be, and using the compass (on the GPS and on my watch) to help with this. I climbed a slight hill, pushing through some viney trees and finally got to the exact location. I looked down, to the side and there it was, partially hidden with pieces of bark and in a bit of a depression. An ammo box, with the Geocache sign on the side.
I took it out, marking the place with a piece of paper, and carried to down and out to the car to show my father. He is in his late-80's and always interested in everything, but this really caught his interest and he asked me a number of questions about it.
Inside there were a few toys and things like that. I didn't bring anything to leave or exchange but I did sign the logbook. Also inside were four numbers, which according to the entry on the website for this cache - is a clue for the cache nearby, on the other side of the dam from where this one is located.
So I signed the logbook and packed everything back up and took the cache back, hid it in the same way as I found it and headed over to find the other one. This one I couldn't find on this trip.

But a few days later, getting more familiar with the GPS I went back and found it right away (not giving any clues here). Then I knew what the numbers in the clue from the other box were for - the combination for the lock. I'm terrible at remembering numbers but not wanting to go back to the other one I again I wracked my brain and finally, after a few jumbled tries, got the right combo.
Inside were some toys, patches, pens, a log book, and a disposable camera. I took my own pic, took one with my camera phone for myself, and looked through the rest of the stuff for a minute before I signed the logbook. I noticed the plastic bag everything was sealed in inside the cache was ripped (maybe I did it taking it out).
I also have looked for a couple more public geocaches. One is on the edge of a parking lot for a local mill. Some dude came out and stared at me, I of course didn't want him to see it if I did find it, plus I would suppose that technically I was on private property, so we left. The other one was on the edge of Walmart parking lot - it was raining, people were going by and staring; a little too strange and geeky for my taste. I'll stick to more private caches thank you.
I like the whole geocache thing, it's fun. But in moderation only.
That evening when my wife came home we went back down so I could show her the cache (it's the first one she's seen/found) and I took her pic and replaced the torn bag with a new one.
---
Entry #4 - "Trails and GPS"
Nearby the previous geocache we also walked on a trail (link for my trails page about this trail and others nearby). The trail was a little rough and needs cleaning out but it's still a good trail. Playing with the GPS some more, still have some learning about making waypoints (and remembering to do so on course changes). Nice to have the speedometer/odometer to pace yourself, and give yourself the ability to make an informed decision on how far you can comfortably walk before you should turn around.
It occurred to me to start adding coordinates/waypoints to my trail pages at Northern NY trails pages - coordinates for the trails themselves as well as parking for the trails and maybe some waypoints on the trails. I want to go back and visit each one anyway to update them. Maybe get a mount for my mountain bike for the GPS receiver?
Fun stuff - mapping out each trail on USAPhotoMaps.
---
Entry #5 - "Geographing"
Another fun-sounded website/thing to do with a GPS. Taking pictures of interesting spots, marking them on your GPS, uploading the pics and geographic location to the Geographing.org website. It combines two of my interests. Something more to look into.
---
Entry #6 - "Confluences & Benchmarks"
Confluences are where the latitude and longitude lines on a map meet (totally artificial points of reference). The website at http://www.confluence.org lets people enter their pics and stories about visiting these sites. The ultimate goal of the website is for every confluence site (outside of those at points over the ocean and in Antarctica) to someday be visited by someone. People log their visits (either to new ones or ones visited before), take photos, provide info.
There's one a short distance from me (everyone is within 50 miles of one) but it's on private property - 44N, 76W. A future interest; and one I'll watch out for on trips to other places that may be more accessible.
Benchmarking is using your GPS and finding NGS survey markers. These geodetic control points are markers in various locations all over the US, and uses for land surveying, civil engineering, mapping, etc. They are usually metal disks or something similar.
This is another fun little thing to do with my GPS receiver but, again, for me - in moderation it can be interesting.
I found one at Seven Bridges at Perch River. It was pretty easy to find, the coordinates weren't real close but a little looking around and reference to the directions let me find it easily. It was a small metal disk, as described, on the first bridge (heading from Watertown).


2 comments:
Krazee Eyez Killa said...
Yo, just wanted to stop by and let you know that I dig your blog.
Holla,
Krazee Eyez Killa
May 9, 2007 8:43 AM
lectrichead said...
Thanks, krazee.
May 9, 2007 8:59 AM
---
Entry #7 - "Pretty good GPS book and stuff"
At the local library I found what looks to be a brand new GPS book called "Outdoors - A Practical Guide for Outdoor Enthusiasts" by Russell Helms. Pretty basic stuff, good for the beginner. You gotta like this dude - he straps a GPS to his push lawnmower so he can see how far he's pushed it.
---
Entry #8 - "Another Cache Found, and people too dumb to use GPS receivers"
My wife and I decided to take the dogs out for a walk, and maybe a trip near the water. Our pup - a Boxer, has never been in the water and we're hoping that we can get him to swim and to be comfortable in the water.
Anyway, there's this place we know of and we've went to many times before, though it's a bit of a drive, I have it listed on my trails website - Black Pond, a nice nature area with walkways and sand dunes (one of the only places in Jefferson County with sand dunes). I decided to check Geocaching.com and see if there were any caches near there - yep, there is. Surprisingly (or maybe not so) there was one near the parking lot. After spending some time with the dogs on the trail we came back and used the GPS until we got close, and found the cache right away. A lot of things in it, as usually I signed it but didn't take anything. I cut my note in the log short as a group of loud people had entered the parking lot, real loud, and the dogs had to go investigate, plus our car was all unlocked and open.
Getting used to finding a latitude and longitude quicker and easier, even while going around large obstacles and going through heavy brush.
Here's an interesting news article - about dumb-asses who have GPS's and not a lick of common sense. When in Doubt, Blame it on Technology Basically they relied on looking at their GPS instead of their own eyes while driving.
As far as I'm concerned if you're that stupid perhaps going out into the world un-assisted isn't your cup of tea...
I didn't know what to call this blog as it will likely have a little something to do with all aspects of using GPS's, mapping, etc and probably lots of my own personal comments. GPS'ing seems as good a name as any...

I've always wanted a GPS receiver, but could never justify to myself the amount of money one costs versus their use, even though their price have come down a lot and continues to do so. I was checking used and new ones on eBay on and off for quite sometime.
One day one of my customers mentioned he'd trade me the brand new one he bought and that he had only taken it out of the box once, in exchange for putting an additional video card in his computer, setting up his software for it, etc. What the heck, I thought.
So I agreed after looking at it again (I played around with it before when he said he couldn't figure it out), it's a Magellan eXplorist 100 (Yahoogroups mailing list that covers it, in case you got one and are interested. They don't talk about the 100 much - maybe they consider it the mentally handicapped brother to the nicer models or something). Fairly basic, no maps but it does the job.
Reading info from the manufacturer's website - says that there is no computer interface built into it but some hackers found that there is a place for one, and a simple interface cable is all that's needed, this company makes them. This may be my next acquisition. Another website also shows how to make your own.
Nice device, well-made, looks fairly waterproof. It fits in my padded cellphone case real nicely, and a lanyard from a waterproof flashlight fits on it.
It shows routes and guides you back to waypoints, does 2000 waypoints, shows an odometer and pedometer/speedometer, has a compass of sorts (it depends on the satellite signal, it's not a real magnetic compass), has WAAS (for more accuracy), and pops up a message to tell you when you are close to your destination. Super geekalicious.
Just watch out in 2011 or so when solar flares are going to play hell with the GPS sats - story.
Wish thisone had the built-in roadmaps though but not missing it so far. Maybe someday I'll want a better one with the roadmaps (though I can't see myself saying "Tom-Tom, where the f*** am I?").
---
Entry #2 - "A little trip and playing around with the GPS receiver"
Well, got behind on this. I'll catch up with what I'm doing with the receiver a little at a time.
Once I received the receiver I hurried through as much work as I could do well in a short time and took a trip out onto the small trail I have cut through the woods, and played around with 'finding' my way back using the GPS receiver's trackback feature, marking waypoints, etc. A little something to get comfortable with it. Then it was back to work, I had a number of those small website-related things that seem tiny but take up an hour each.
Later in the day I had finished or nearly finished everything. I headed out and went into some no-man's land that I know the location of, that I've been wanting to get back out to. There's some interesting cliffs and natural formations out there so I thought I could gain a little experience in using the functions of the GPS receiver by waymarking them, amybe trying to find my way back, and also to have fun with plotting the interesting points I run across on USAPhotoMaps.
USAPhotoMaps is a great program for downloading Terraserver sat and aerial photos (including color sat ones of some major cities) and topographical maps, plot points and routes, etc, plus it can interface to a GPS.
Anyway, I started walking out in this no-man's land (it's not really, the owner just hasn't done anything with the land, due to it's inaccessibility and roughness, I would guess - lots of hunters and local people use it). As soon as I started walking out there I found a whole series of trails that someone had painstakingly cut through the area - they hadn't been there a few years ago when I went out there. I immediately started marking out the trail on the receiver and watching as the screen started showing where I had been and where the other parts of the trail was in relation to me. Very nice. Very geeky.
I then headed over toward the location of the cliffs I knew about. I had been over in this section a few years before, and walked along the cliffs until I could find a good place to climb them. This area is extremely dense with brush, and there's places where a person can't even walk - even bullying through the brush, and I had to walk back and forth in some locations to find a better path through this brush.
If you're not familiar with the denseness of the brush in some parts of the North Country of NY state it may be hard to imagine. Some people I've mentioned this to, even some who are avid outdoors-people, I think sometimes haven't ran across some of the bad areas that are almost impassable like this.
I remember once I was hiking and got into some brush that was extremely bad. I bulled my way in further and further but got to a point where I was walking on top of a layer of the brush below, because it was so thick and still pushing through more of it. It was like walking on a springboard or something. But at one point I couldn't go forward even with walking on top of the brush, for a panicked moment I couldn't go back or in any directions. Pretty bad.
Anyway, I didn't run into anything quite as bad on this trip, just a lot of dense stuff.
While walking through some moderately heavy brush I saw something through it. What looked like a domed building.
As I got closer I could see that it was a dense pack of vines. They must have
 started growing over a tree (the tree underneath was dead) and killed it, then kept growing over and over itself, creating a dome-shaped thing, which was hollow inside except for the rotting skeleton of a scrub tree. The inside would be hard to get to but it was less dense at the bottom, a natural shelter which could be enhanced with some bark, leaves, and wood on top, if so desired. There were also three or four more of them, but none as impressive or well-defined as the one in the photo at the right. Of course I waypointed it so I could find it again. I took off my backpack, hauled out the digital camcorder and got some videotape of these (see still capture from video at right- I didn't take shots with my regular digital camera on this trip, though of course I had it with me).
 Nearby was a large hill, looking like a giant had plopped down a chunk of limestone and dirt - which was so surrounded by vines and brush I had a hard time finding a side that I could climb (and it was fairly steep). This hill was partially on the windward side, which would protect the vines from the heavy windows blowing through this slightly higher elevation.
On top of the hill (again, marked on the GPS so I could return later) I could see in all directions, a large power line was nearby, and I could see the cliffs that were my destination, as well as a stand of Pine trees. I knew within a mile was another much large woods of them, but this was a small group near the foot of the other end of the cliffs.
I could also see some open space leading up to this area - I'd be able to mountain bike back here quicker then walking next time, with out much trouble (plus I could walk back this way, and still use my first waypoint as reference).
Looking over the edge of the hill I could see a brown plastic pail that someone had thrown over the edge. There didn't seem to be any other signs of tracks or anything, nearby on the leveler ground I had seen what looked like old ATV trails and, of course, the cut trails were behind me at this point. Why did someone come out here and go through dense brush to throw an old pail over a hill? I don't know.

The top was certainly a great spot and afforded a great view in 360 (you can see in the still capture the heavily-brushed valley that I was getting set to head across).
After a few quick videoshots from this location I descended and, after another look at the viney domes, I headed toward the cliffs. Passing over the stream that I knew ran through the lower elevation of the valley I could see how much it was used by local animals, the few game trails didn't do me too much good at this point. A lot of coyote poop everywhere, and occasional deer bones. There's a lot of deer and a lot of coyote around here.
I finally reached the cliffs. This was at a different location as when I had been here before a few years ago. I waypointed it and looked for a way to get up.
The cliffs here aren't real tall and I could climb them if I really wanted to take a few chances. I didn't, but I found a few places where the stone had fallen and climbed up enough to peek over the edge. Woods, blowing wind. Nice place to look around and relax but this trip was going to be a short one.
I stood at the foot of the cliffs for a moment. Geez, I hadn't told anyone or left a note of where I was going - something I never forgot to do. I was in such a hurry to try out the GPS I had forgotten. Never a good idea.
Some of the locals tell about seeing bear around here, and things like that. It may be pretty dense woods but it's surrounded by lots of civilization, and it's really not that large of a wilderness area, I doubt any bear would or could live here. Though they might be passing through. Fort Drum has a Black Bear population - a story was done on the Discovery Channel or Animal Planet recently. Despite the denseness there's not that much area right here; plenty of wildlife and food for smaller animals like coyote but probably not large and more aggressive stuff. Some locals to this little area say they see bear, lynx, and other stuff that probably are figments of their imaginations, like occasionally seeing UFO's and Bigfoot.
Anyway, I had accomplished what I was looking to do so I turned around and headed back, trying to find the same 'path' I had taken across the valley, or something easier - the dense brush was terrible here, catching my hat, my safety glasses/sunglasses, and any protruding piece of my backpack (like the hunting knife in easy reach on the side). Finally, after getting to a bit more clearer area and referring to my GPS I got back to the viney hill, and headed along the much-easier walking of the clear almost-fields. I made good time, traveling at 4.5 miles per hour or so according to the GPS. Yea, very geeky stuff.
At one point I came across a large sinkhole, looked like a group of woodchucks were using it for woodchuck city. I could have easily gotten inside the sinkhole, and after waypointing it and looking around, I couldn't find any others or even a sign of rock holes nearby.
I continued back, passing over a couple old stone fences and some signs of old wooden fences. Remembering looking at this area on the satellite map the signs of old fields could still be seen, though from the ground the definition of these property lines were hard to pick out.
Watching the GPS I headed back to the cut trails and caught up with one. On the way on another leg of the trails I found some surveying stakes.
Fun, wish I had more time for hiking and/or mountain biking.
After I got back I copied (gotta get that interface) all the waypoints and entered them into USAPhotMaps.

---
Entry #3 - "Geocaching"
I've been moderately interested in the idea of Geocaching (originally called something like "GPS Stash Hunt").
Basically, it's like a game - someone hides a cache somewhere and provides coordinates to others (usually over the Internet), who use their GPS receivers to find the general location of the cache, then usually search by sight for it. Some people really hide them in hard places to find, some caches are simpler to find, and some provide clues to finding other caches and are multi-legged hunts. They also have geocaching events, etc.
When a person finds a cache they may sign a logbook, log it on a website, leave something for the cache or take something and leave something in exchange. It's a little like a treasure hunt with symbolic "Treasures". Thousands of people all over the world do it, as well as clubs and organizations. There's also different twists on it and lots of "in-words" and phrases.
So I gave it a try. Not far away there are two caches, walking around in the woods with my wife and the dogs I found the coordinates but not the cache. Having written down the coordinates and converted them to the default latitude and longitude format my GPS showed - cut off a few decimals places, so I was kind searching a large area instead of pinpointing the location as much as I could have. Next time out I'd write down the full coordinates down to the last decimal.
A few days later I went back, taking my father along this time, and armed with the coords down to the last decimal. I walked around a bit, getting used to which directions to go to increase and decrease the latitude and longitude for a search pattern and pinpointing the exact place I want to be, and using the compass (on the GPS and on my watch) to help with this. I climbed a slight hill, pushing through some viney trees and finally got to the exact location. I looked down, to the side and there it was, partially hidden with pieces of bark and in a bit of a depression. An ammo box, with the Geocache sign on the side.
I took it out, marking the place with a piece of paper, and carried to down and out to the car to
 show my father. He is in his late-80's and always interested in everything, but this really caught his interest and he asked me a number of questions about it.
Inside there were a few toys and things like that. I didn't bring anything to leave or exchange but I did sign the logbook. Also inside were four numbers, which according to the entry on the website for this cache - is a clue for the cache nearby, on the other side of the dam from where this one is located.
So I signed the logbook and packed everything back up and took the cache back, hid it in the same way as I found it and headed over to find the other one. This one I couldn't find on this trip.

But a few days later, getting more familiar with the GPS I went back and found it right away (not giving any clues here). Then I knew what the numbers in the clue from the other box were for - the combination for the lock. I'm terrible at remembering numbers but not wanting to go back to the other one I again I wracked my brain and finally, after a few jumbled tries, got the right combo.
Inside were some toys, patches, pens, a log book, and a disposable camera. I took my own pic, took one with my camera phone for myself, and looked through the rest of the stuff for a minute before I signed the logbook. I noticed the plastic bag everything was sealed in inside the cache was ripped (maybe I did it taking it out).
I also have looked for a couple more public geocaches. One is on the edge of a parking lot for a local mill. Some dude came out and stared at me, I of course didn't want him to see it if I did find it, plus I would suppose that technically I was on private property, so we left. The other one was on the edge of Walmart parking lot - it was raining, people were going by and staring; a little too strange and geeky for my taste. I'll stick to more private caches thank you.
I like the whole geocache thing, it's fun. But in moderation only.
That evening when my wife came home we went back down so I could show her the cache (it's the first one she's seen/found) and I took her pic and replaced the torn bag with a new one.
---
Entry #4 - "Trails and GPS"
Nearby the previous geocache we also walked on a trail (link for my trails page about this trail and others nearby). The trail was a little rough and needs cleaning out but it's still a good trail. Playing with the GPS some more, still have some learning about making waypoints (and remembering to do so on course changes). Nice to have the speedometer/odometer to pace yourself, and give yourself the ability to make an informed decision on how far you can comfortably walk before you should turn around.
It occurred to me to start adding coordinates/waypoints to my trail pages at Northern NY trails pages - coordinates for the trails themselves as well as parking for the trails and maybe some waypoints on the trails. I want to go back and visit each one anyway to update them. Maybe get a mount for my mountain bike for the GPS receiver?
Fun stuff - mapping out each trail on USAPhotoMaps.
---
Entry #5 - "Geographing"
Another fun-sounded website/thing to do with a GPS. Taking pictures of interesting spots, marking them on your GPS, uploading the pics and geographic location to the Geographing.org website. It combines two of my interests. Something more to look into.
---
Entry #6 - "Confluences & Benchmarks"
Confluences are where the latitude and longitude lines on a map meet (totally artificial points of reference). The website at http://www.confluence.org lets people enter their pics and stories about visiting these sites. The ultimate goal of the website is for every confluence site (outside of those at points over the ocean and in Antarctica) to someday be visited by someone. People log their visits (either to new ones or ones visited before), take photos, provide info.
There's one a short distance from me (everyone is within 50 miles of one) but it's on private property - 44N, 76W. A future interest; and one I'll watch out for on trips to other places that may be more accessible.
Benchmarking is using your GPS and finding NGS survey markers. These geodetic control points are markers in various locations all over the US, and uses for land surveying, civil engineering, mapping, etc. They are usually metal disks or something similar.
This is another fun little thing to do with my GPS receiver but, again, for me - in moderation it can be interesting.
I found one at Seven Bridges at Perch River. It was pretty easy to find, the coordinates weren't real close but a little looking around and reference to the directions let me find it easily. It was a small metal disk, as described, on the first bridge (heading from Watertown).


2 comments:
Krazee Eyez Killa said...
Yo, just wanted to stop by and let you know that I dig your blog.
Holla,
Krazee Eyez Killa
May 9, 2007 8:43 AM
lectrichead said...
Thanks, krazee.
May 9, 2007 8:59 AM
---
Entry #7 - "Pretty good GPS book and stuff"
At the local library I found what looks to be a brand new GPS book called "Outdoors - A Practical Guide for Outdoor Enthusiasts" by Russell Helms. Pretty basic stuff, good for the beginner. You gotta like this dude - he straps a GPS to his push lawnmower so he can see how far he's pushed it.
---
Entry #8 - "Another Cache Found, and people too dumb to use GPS receivers"
My wife and I decided to take the dogs out for a walk, and maybe a trip near the water. Our pup - a Boxer, has never been in the water and we're hoping that we can get him to swim and to be comfortable in the water.
Anyway, there's this place we know of and we've went to many times before, though it's a bit of a drive, I have it listed on my trails website - Black Pond, a nice nature area with walkways and sand dunes (one of the only places in Jefferson County with sand dunes). I decided to check Geocaching.com and see if there were any caches near there - yep, there is. Surprisingly (or maybe not so) there was one near the parking lot. After spending some time with the dogs on the trail we came back and used the GPS until we got close, and found the cache right away. A lot of things in it, as usually I signed it but didn't take anything. I cut my note in the log short as a group of loud people had entered the parking lot, real loud, and the dogs had to go investigate, plus our car was all unlocked and open.
Getting used to finding a latitude and longitude quicker and easier, even while going around large obstacles and going through heavy brush.
Here's an interesting news article - about dumb-asses who have GPS's and not a lick of common sense. When in Doubt, Blame it on Technology Basically they relied on looking at their GPS instead of their own eyes while driving.
As far as I'm concerned if you're that stupid perhaps going out into the world un-assisted isn't your cup of tea...
Monday, June 26, 2006
From my wireless range extending blog
Here's the entirety of my wireless range extanding blog:
---
Entry #1 - "First Message"
Well, I've set up blogs for people before and even set up a few of my own for testing. But I've never had much interest in actually using one until now.
Originally I had set up a webpage with some info on my own learning/experiments in extending the range of wireless networking, but as I added and deleted info it got disjointed and disorganized, and I didn't know what to do with it.
So I decided to try this blog format. Thanks to Blogger.com for providing free blogs for lots of people.
A quick note about me... I have been working with electronics, radios, and specially computers since I was a kid and my work is computers and the Internet.
----
Entry #2 -"A little info...and different things"
I originally wanted to do some long-distance experimenting with wireless networking.
Firstly though, I want to say that this blog and info is for people who want to LEGALLY experiment with long-distance wifi. If you're trying to use your neighbor's connection without his permission then please go elsewhere. Remember, if you don't have permission to use it and it's not a free access point then it's illegal to connect to it.
Wireless networking has definitely held high interest for me. It combines some of my hobbies and work (computers, networking, radios, and electronics) into one thing.
So I picked up a couple routers and wireless cards. Unfortunately they were all ones that did not have detachable antennas (older Belkin and Netgear) . I figured I'd put antenna connectors on them, but after looking at the tiny traces I'd have to connect to I put my experimenting on the back burner for a time and just played with the wireless aspect 'as-is'.
I did set up a local Wireless Networking in NNY Yahoogroups Mailing List, and while a few people joined and posted it quickly died.
I want to also throw in a quick thank you to an old friend of mine, Peter B. - he's given me some older obsolete equipment to mess with over time and we've traded software, links, and advice for years.
A quick and easy project you can try, that really works - is to make reflectors for the stock antenna on your router or PCI card. It does work, maybe 10 - 17% increase in power or so. Here's the original link and a modified one here.
One of the projects I was working on - adding an antenna to my existing Belkin PCMCIA card. Blah. Anyway, some info from my old webpage:
Abandoned project - Belkin Wireless PCMCIA Notebook Card Model F5D6020 ver.2
This card is much different then the version 1 of this model. Version 2 is the same as the SMC-2632 card and has a Atmel AT76C502A Chipset.
To add an external antenna I researched the links you can find below as well as many, many others, and Usenet groups too. I found nothing on modding my card, but some on other cards. After giving up on finding anything I set out to figure it out myself. First I checked the FCC database and found some info after entering the FCC ID of the card. Some internal photos from Belkin showed some nice shots of the 'innards' of this bird. But nothing on taking it apart.
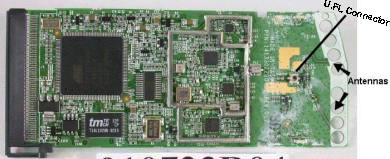
I could find the two small antennas and a U.FL plug (used for testing?) in the photos. After a little fiddling with the actual card I saw that I might destroy the card before I got it apart.
Back to the pictures I got from the FCC site first... On closer examination on one of the photos I could see the Belkin label on the plastic part seems to be covering an access hole, and it looks like it is right over the U.FL connector and is on the correct side. Carefully peeling it up reveals this to be true (see pic below).
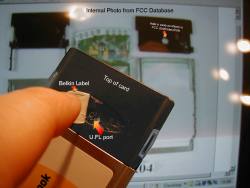
Now all I needed to do was find a U.FL connector for it, and wire some some pigtails into a BNC connector. Once I have that I will be all set to test external antennas. Supposedly on other cards when you plug something into the U.FL port it disconnects the internal antennas, but also the U.FL port might not be a heavy-use connector. So possibly it will be best to permanently mount this connector onto the card and always use an external antenna - plugging it into the N connector on the end of the pigtail instead. These little U.FL connectors seem to be very expensive for their size!
I ordered a U.FL to N pigtail from netgate.com (item #PIG-UFL-NF-19) . It cost about $23, after shipping. Received it fine and plugs in under the label on the card, just like it is supposed to. Now I just need to mate an antenna to it. NOTE - this project is abandoned...
---
Entry #3 - "A reason for a little experimentation"
Out here in the country the dial-up service for the Internet isn't that good (we use Verizon for the phone line and Westelcom.com for the ISP. Recently we had so much trouble with the telephone that we couldn't get online and could barely talk in the evening, because of the static. We called Verizon and a tech guy came out the next guy. The guy was a real knowledgeable, helpful dude who re-wired each box from here to Watertown after I told him we had this problem each year. We got great speeds after that, but still slow by most people's standards).
There's no DSL and so far no sign of it. Satellite is too expensive, and so is using a cell-phone for it. Roadrunner doesn't travel all the way down my road but I'm close to a main road where it does go.
Time Warner refuses to make the cable run to us, no matter how much we bug, cajole, or argue with them they won't do it unless we pay mega-bucks to have it done ourselves.
Doing a good portion of my work online it gets tedious and sometimes downright impossible to use dial-up.
Running my own cable that distance is pretty impractical. I'd need an amplifier for the signal if I used smaller coax, and it would be pretty expensive if I used a less-lossy but larger coax.
A quick look around shows that my kitchen window has a direct LOS (Line Of Site) with the window of another house on the main road where existing cable for TV already is installed. The neighbor is even willing to let me pay for RR set up at his place, as well as set up equipment to send the signal wirelessly to me.
So I needed a wireless bridge between a broadband connection and our home/office network.
---
Entry #4 - "The Mighty WRT54G"
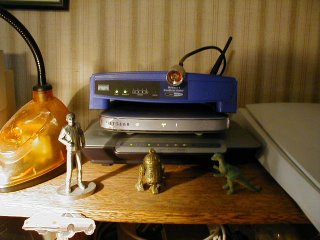

After doing some research and picking up a few more routers, I finally settled on the hobbyists' choice of a Linksys WRT54G which could be made into a wireless bridge - this saves me from buying a dedicated bridge router and it's cheaper, has more features, plus I can use it for other things if the project doesn't work out or we actually get some sort of broadband connection directly to our house.
Great router, but even better with the DD-WRT firmware replacement. I tried a few other firmware replacements (like Freeman Basic) and finally settled on the DD-WRT. You can find a list of others at Linksysinfo.org.
Basically - it's a great router out of the box but a bunch of people found out that they could create their own LINUX-based firmware (the firmware is the operating system for the router). This firmware added many more features to the router, like the ability to increase it's power output, make it into a repeater and bridge, as well as many other features.
The process of replacing the existing firmware is easy, though it does come with it's own risks. Screwing up can 'brick' the router - render it dead, unusable. There are some methods for restoring it; some of them easy and some more involved, like shorting pins on a component inside, or using a JTAG cable and some software.
There is tab on the original firmware web-based interface to update the firmware. Linksys expected you to update with their own firmware of course, but it works for this after-market software just was well.
All you need to do is go to the DD-WRT site, download the correct firmware for your version of the router (it comes in a number of different versions), and upload it via the web interface to the router. Restart it and you're all set.
Unfortunately I ran into some troubles learning how to make it into a bridge and making it work with an older 802.11b Linksys router. I had a lot of work to do, plus we were having a large addition put on our house as well as all the projects that went with it. It took me quite some time to get back to working on the project. One of the most helpful messages was the one in this thread.
---
Entry #5 - "The Bridge - It works, now to tweak it"

I finally got it to work, thanks to lots of articles on the process and lots of experimenting. There was a thread on linksysinfo.org that was a great help but the link is no longer valid and I can't find the particular nor who wrote it. A good link from the DD-WRT WIKI on bridging, this one also explains it, though it pertains to different firmware.
You should be able to use pretty much anything as your main router, unlike where you use WDS - you don't need the same piece of hardware at each end. Just make note up your network settings on the main router, as well as it's SSID and channel.
Basically:
*Upload the firmware to the router you want to use as a bridge, reset the router, and make sure your computer is connected directly to the router. You probably should turn off any security on your main router until you have this all working correctly. It's best if you use Internet Explorer to do the following, and make sure your computer is plugged directly into the router you want to use as a bridge. Log into the router using the web-based interface.
*On the first tab, Setup; turn off STP and disable Internet connection Type. Scroll down and go to the Router IP and set this to something outside the range of the DHCP on your main router. If you main router is 192.168.5.1 and the DHCP range is 192.168.5.2 to 192.168.5.100 then set your bridge to something above 192.168.5.100. I also disabled DHCP on the bridge router.
*Go to the Wireless tab and make sure the router is on AP, and set it to the same SSID and channel as the main router.
*Go to the Security tab and turn off the firewall.
*Go to the Administration tab and turn on Telnet.
*Now reboot the router, you can do this on the admin screen.
*Go to your network settings on your computer and temporarily set the IP of your computer to something outside of the main router's DHCP but not the same as the one you assigned the router. Open a Telnet client, there should be on already on your computer.
*Type these lines, pausing a little after each one:
wl ap 0
wl wet 1
wl join SSID
nvram set rc_startup="wl ap 0;wl wet 1;wl join SSID
nvram commit
The first line turns off the AP mode that you set. This turns real bridge mode on, you've just saved yourself a lot of money and have an equivalent to a Linksys WET54. The third line joins you to the main router's SSID (make sure you put in the correct SSID here). The fourth and fifth lines save this info to the bridge router's memory (again, make sure you have the correct SSID in place). Once you get everything working you can add the WPA network key after each instance of SSID (I haven't tried this). The router should have connected to your main one at the third line so you should be all set.
*Now you can set your computer's IP back to assigned or whatever you had it set at before and you should be all set.
Follow these instructions, though I see on the recent version of DD-WRT (V23) you can click on the STATUS tab, then WIRELESS sub-tab, click the SURVEY button near the bottom, and it should pick up the main router (after following the above directions). Just click JOIN over on the right.
On my project the Linksys 802.11b router was the weak link. Over the distance I needed, the signal dropped enough for it to ramp down to a lower speed - I needed as much signal strength as possible to cut through potential hard rains, heavy snows, and other weather conditions that might decrease the signal further.
I could increase the power of the existing WRT54G in the settings for it, but I didn't want to increase it too much. Both because going too far might burn it out or decrease it's life, and the fact that increasing the power is only one-way; the router at the other end might receive better with a higher signal from this end but it's stillnot going to make my end receive any better...
Lots of great features in this firmware. You can even throttle some ports and applications so that they get more bandwidth priority over other things, under the QoS rules. Very nice. Also, an IP can be entered to prioritize certain computers, haven't tried this yet but sounds useful.
So I decided to get working on some antennas as well as picking up another WRT54G.
The first WRT54G was a version 3, maybe the best version they came out with?
Unfortunately I was still learning the in's and out's of the piece of equipment and waited too long to buy another - I got a version 5. Linksys, for whatever reason (which is debated) decided to give the version 5 a different OS (VXware) and less memory. Both of which severely limited customizing it. The DD-WRT software couldn't be uploaded and run on it, nor any other third-party firmware. And by the time I got done screwing around with trying and waiting for another version of formware to come out - it was too late to return it.
At some point someone did figure out how to do it, but with the help of a cable called a JTAG, which plugged into the router internally and used a modified version of the DD-WRT software. While it was certainly within my scope of abilities I felt that was a bit more time and resources then I wanted to put into it for the time-being.
But the V5 worked pretty well in it's stock form, anyway.
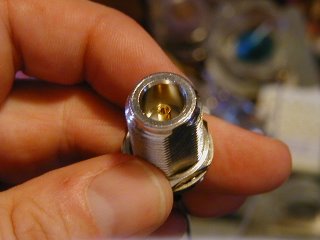
I set about making antennas. Which turned out to be a problem - not the making of them but getting that connectors. The N-connectors I needed to make the antennas couldn't be found around here and buying something for $5 online meant paying at least that much or more in shipping. Finally I found a couple good deals on eBay as well as on two pigtails. The pigtails had to be special ones, with the N-connector - needed to plug into the antennas - on one end, and a reverse TNC on the other. Why would Linksys put a reverse TNC on their routers instead of a standard one ? I don't know. Finally, I found a set for a fair price so now I had all the pieces - two N-connectors and two pigtails with matching N-connectors and reverse TNC on the other end. All I had to do was experiment with making the antennas.
Wow, a group of experimenters managed an un-amplified WI-FI connection of 125 miles! Click here and here.
---
Entry #6 - "Antennas and Other General Methods For Better Signal"
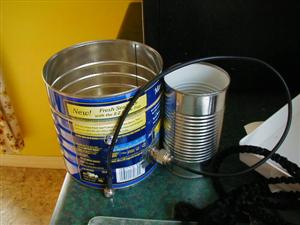 I had fun; I used coffee cans, bean cans, canned vegetable cans, and a satellite dish. Some baked bean cans seemed to work the best. Bush's I believe (the one on the right). A friend recently brought me a large dish for experimenting. Unfortunately, after checking it, it has no metallic surface so I will need to use a mesh on it. But it should be interesting.
Using the baked bean cans I can get an okay signal for the distance I need (while aiming the can antennas I even picked up someone else's wireless). But I need to play around with where to mount the N-connector in the cans as well as work on aiming. Good link with calculator for making your own tin can antennas.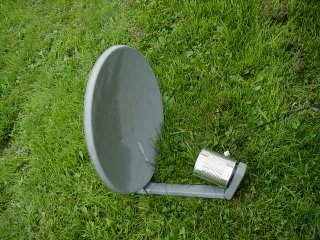
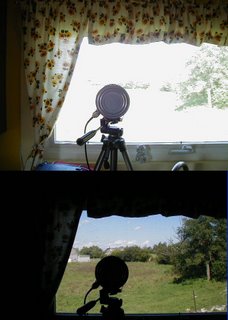
I set up a test computer at the other end with a webcam running, and get a consistent good signal. It took me awhile to figure things out and even longer to get the time to play around with the whole thing, but finally a good beginning success.
Here's the distance I need to cover, with a tin can antenna set up on a tripod. You can see the house in the distance if you look closely.
There's a number of other things you can do for a better signal, in general.
If you are using your router for trying to cover a particular area or location then you can try various temporary things like putting cookie sheets or something else with a reflective property behind the router (on the opposite side form where you want the signal to go) to reflect the signal. And/or by building these simple antenna reflectors - http://www.freeantennas.com/, the last three listed there. You just slide these over your existing router's antennas and sometimes can get about 10+% more signal in the direction the reflector is pointing, or even more. I have had really good results with these. If you're not good at "crafty" projects they might come out looking not-so-great, but they usually help either way.
In addition to making your own antennas like mine at the beginning of this entry, or the antenna reflectors from the above paragraph; you can go for a high performance 2.4GHz commercial antenna. But, of course, these can cost hundreds of dollars. And you can get the same or better performance by just making your own, for a fraction of the cost.
You can also just get online and buy a Cantenna, already made and with pigtails matching your router and sporting a snappy paint job. These are basically the Pringles can antennas that people make, prettied up and all ready to go. http://www.cantenna.com/
One thing to remember is that even though there are usually two antennas on your router, it is sampling them and picking the one with a best signal, or at least what it thinks is the best signal. So you can't replace one antenna with a directional antenna and leave the other omni-directional in place and expect to get the benefits of both - it's one or the other that the router will use. The DD-WRT firmware and some others let you select which antenna you want to use.
So anyway, the above methods you would only use if you needed an increase in strictly directional signals.
For omni-directional increase in coverage you can replace the stock antennas with somewhat better ones with higher gain. You can get these for $40 or $50, or even less on eBay. A few examples are near the bottom of this Linksys page. Just make sure that if you go this route you get one with the proper connector for your particular router. You can also finds plans on the Internet for making your own omni-directional antennas, but they're certainly less popular then directional ones. Here's plans for one.
With the DD-WRT firmware you can boost the power of the WRT54G router series, just don't go crazy with it and pump it to the max. Your router may overheat and be ruined, or you may decrease the overall life of it. Other routers may have this feature.
You can also get 'booster amps', but while these will amplify your signal they are also going to amplify any interference and noise too. Not to mention they'll cost more then you paid for your router, probably.
---
Entry #7 - "The WRT54G V5 firmware update"
Well, someone has finally done it and figured out how to update the WRT54G V5 without using the JTAG cable. Link here.
I haven't tried it as yet, let them work out the bugs a little first.
---
Entry #8 - "Adding another router to cover more of the home/office - Alternate Configuration is very useful"
Another computer tech seemed to be surprised that I was daisy-chaining routers together, not sure why. No cross-over cat5 is needed or anything, just plug 'em into each other. Daisy chained combos of wired and wireless together fine, had five in a row at one time when I was setting them up.
I have everything set up with static IP's and when I want to add a router I just give it another IP in the same network range, turn off DHCP. With a new addition to the house my old wireless router wasn't going through the walls well enough so I added one right below the floor in the new section of the house, water-proofed it in a sealed plastic bag (the router didn't seem to generate enough heat down there for the bag to stop the heat dissipation, the cellar is real cool all times of the year - but something I'm still checking just to make sure).
Now the rest of the house is covered as well as the back deck and yard. I have it on a switch so that it is only energized when I need it to be.
Alternate Configuration is very useful
This is useful if you regularly connect to different networks where one has static IP addresses assigned to each computer and others don't. Set it up under this tab and let Windows do the work for you, so you don't have to go in and switch it every time.
You can find Alternate Configuration by going to your Network connections and right-clicking on your wireless card, then selecting Properties. On the first tab (General) you'll see Internet Protocol TCP/IP listed, select this and then click Properties. On the next screen make sure Obtain an IP address automatically is selected and you should see the Alternate Configuration tab, click that and then User Configured and enter your static IP and other info here.
This works with Wireless Zero Configuration turned on so make sure that's all set up (with the various networks you are using set to automatically connect).
Once everything is set it should automatically discover and switch between static and automatic IP configuration depending on when it's needed.
---
Entry #9 - "A few interesting links"
Network research tools from Microsoft. Interesting.
---
Entry #10 - "WRT54G V5 DD-WRT Micro Firmware Burn Success"
Well, with fingers firmly crossed and after a look at the length of my warranty from Linksys - I just went ahead and followed the instructions for burning the DD-WRT Micro firmware.
One small SNAFU - after the VX_Killer upload I couldn't connect to the router...
I had to manually set the IP address of the computer to a fixed address, as it would not pick up a dynamic address from the router at this point, no matter what I did.
But once I did that I could use the TFTP program to upload the DD-WRT Micro firmware and everything worked fine after that.
The micro version seems to be feature-packed and has everything and more that I need.
3 comments:
---
Entry #11 - "Finally Found a 12 Inch Chinese Vegetable Strainer"

Finally found a 12 inch Chinese vegetable strainer for my next experimenting. Why do all the stores only sell 8 inch or below? Found a cheapo one at a dollar store in Syracuse.
Now where the hell is that Netgear USB device, still stuck in transit I guess...? It should be mountable right at the 'focus' of the strainer.

---
Entry #12 - "Some Testing with USB device, Satellite Dish, and Strainer"
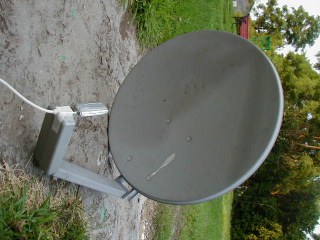
I finally received the MA111V2 (re-manufactured, and free shipping!) USB Netgear adapter from a company called JustDeals.com. So I grabbed a USB extension cable I had and packed the laptop up to take outside for some test.
The directivity on the strainer is neglible so far. I believe that it isn't a perfect parabola, for one thing, as the sides angle up too quickly to about 90 degrees. Still doing tests with it as I have to devise some way to mount the adapter in the middle of it, without using a Rube Goldbergian popsickle stick assortment and scotch tape...
Better results with the old Dish Network satellite dish. I cut the horn (LNB, the little roundish thing that sticks out intho the middle of the dish) off it and mounted the wireless adapter right there with some tape. A little screwing around with angles and such and I had a quick, down-and-dirty, probably-not-quite-at-the-focal-point mount for it.
Some good results and while testing it with my own wireless routers and Netstumbler I picked up some neighbor's wireless networks. And I'm not exactly close to any neighbors.
A quick check with the Windows' wireless software showed an okay passive signal strength for both receiving my own network and others nearby.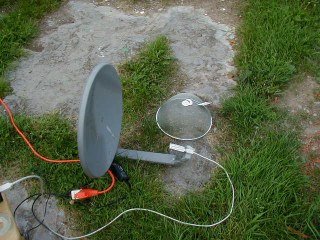
But on further testing with rotating the dish I get some strange results. Still testing. At right is the strainer, and the dish setup.
I have noticed that even without a reflector and with the USB extension cable plugged in the device picks up my home network better then any PCMCIA card. Definitely nice for getting more range for your own network, or for wardriving as you'd just hang the device from your rearview mirror for better reception, even without any other mods.
For those who are into wardriving you can download a version of LINUX made just for doing wireless surveys or wardriving or what-have-you - link.
---
Entry #13 - "Wow, Geekalicious"
Check it out, you won't be sorry - http://www.smithstuff.net/steercan/Steercan.htm
---
Entry #1 - "First Message"
Well, I've set up blogs for people before and even set up a few of my own for testing. But I've never had much interest in actually using one until now.
Originally I had set up a webpage with some info on my own learning/experiments in extending the range of wireless networking, but as I added and deleted info it got disjointed and disorganized, and I didn't know what to do with it.
So I decided to try this blog format. Thanks to Blogger.com for providing free blogs for lots of people.
A quick note about me... I have been working with electronics, radios, and specially computers since I was a kid and my work is computers and the Internet.
----
Entry #2 -"A little info...and different things"
I originally wanted to do some long-distance experimenting with wireless networking.
Firstly though, I want to say that this blog and info is for people who want to LEGALLY experiment with long-distance wifi. If you're trying to use your neighbor's connection without his permission then please go elsewhere. Remember, if you don't have permission to use it and it's not a free access point then it's illegal to connect to it.
Wireless networking has definitely held high interest for me. It combines some of my hobbies and work (computers, networking, radios, and electronics) into one thing.
So I picked up a couple routers and wireless cards. Unfortunately they were all ones that did not have detachable antennas (older Belkin and Netgear) . I figured I'd put antenna connectors on them, but after looking at the tiny traces I'd have to connect to I put my experimenting on the back burner for a time and just played with the wireless aspect 'as-is'.
I did set up a local Wireless Networking in NNY Yahoogroups Mailing List, and while a few people joined and posted it quickly died.
I want to also throw in a quick thank you to an old friend of mine, Peter B. - he's given me some older obsolete equipment to mess with over time and we've traded software, links, and advice for years.
A quick and easy project you can try, that really works - is to make reflectors for the stock antenna on your router or PCI card. It does work, maybe 10 - 17% increase in power or so. Here's the original link and a modified one here.
One of the projects I was working on - adding an antenna to my existing Belkin PCMCIA card. Blah. Anyway, some info from my old webpage:
Abandoned project - Belkin Wireless PCMCIA Notebook Card Model F5D6020 ver.2
This card is much different then the version 1 of this model. Version 2 is the same as the SMC-2632 card and has a Atmel AT76C502A Chipset.
To add an external antenna I researched the links you can find below as well as many, many others, and Usenet groups too. I found nothing on modding my card, but some on other cards. After giving up on finding anything I set out to figure it out myself. First I checked the FCC database and found some info after entering the FCC ID of the card. Some internal photos from Belkin showed some nice shots of the 'innards' of this bird. But nothing on taking it apart.
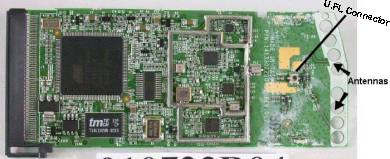
I could find the two small antennas and a U.FL plug (used for testing?) in the photos. After a little fiddling with the actual card I saw that I might destroy the card before I got it apart.
Back to the pictures I got from the FCC site first... On closer examination on one of the photos I could see the Belkin label on the plastic part seems to be covering an access hole, and it looks like it is right over the U.FL connector and is on the correct side. Carefully peeling it up reveals this to be true (see pic below).
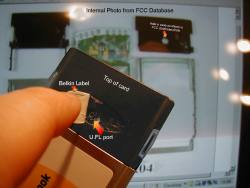
Now all I needed to do was find a U.FL connector for it, and wire some some pigtails into a BNC connector. Once I have that I will be all set to test external antennas. Supposedly on other cards when you plug something into the U.FL port it disconnects the internal antennas, but also the U.FL port might not be a heavy-use connector. So possibly it will be best to permanently mount this connector onto the card and always use an external antenna - plugging it into the N connector on the end of the pigtail instead. These little U.FL connectors seem to be very expensive for their size!
I ordered a U.FL to N pigtail from netgate.com (item #PIG-UFL-NF-19) . It cost about $23, after shipping. Received it fine and plugs in under the label on the card, just like it is supposed to. Now I just need to mate an antenna to it. NOTE - this project is abandoned...
---
Entry #3 - "A reason for a little experimentation"
Out here in the country the dial-up service for the Internet isn't that good (we use Verizon for the phone line and Westelcom.com for the ISP. Recently we had so much trouble with the telephone that we couldn't get online and could barely talk in the evening, because of the static. We called Verizon and a tech guy came out the next guy. The guy was a real knowledgeable, helpful dude who re-wired each box from here to Watertown after I told him we had this problem each year. We got great speeds after that, but still slow by most people's standards).
There's no DSL and so far no sign of it. Satellite is too expensive, and so is using a cell-phone for it. Roadrunner doesn't travel all the way down my road but I'm close to a main road where it does go.
Time Warner refuses to make the cable run to us, no matter how much we bug, cajole, or argue with them they won't do it unless we pay mega-bucks to have it done ourselves.
Doing a good portion of my work online it gets tedious and sometimes downright impossible to use dial-up.
Running my own cable that distance is pretty impractical. I'd need an amplifier for the signal if I used smaller coax, and it would be pretty expensive if I used a less-lossy but larger coax.
A quick look around shows that my kitchen window has a direct LOS (Line Of Site) with the window of another house on the main road where existing cable for TV already is installed. The neighbor is even willing to let me pay for RR set up at his place, as well as set up equipment to send the signal wirelessly to me.
So I needed a wireless bridge between a broadband connection and our home/office network.
---
Entry #4 - "The Mighty WRT54G"
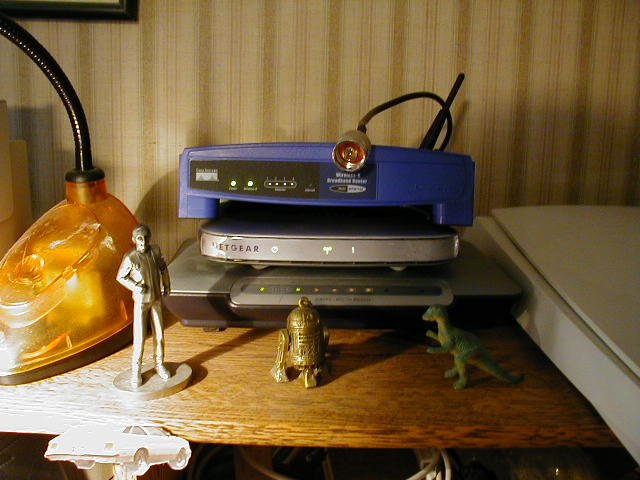
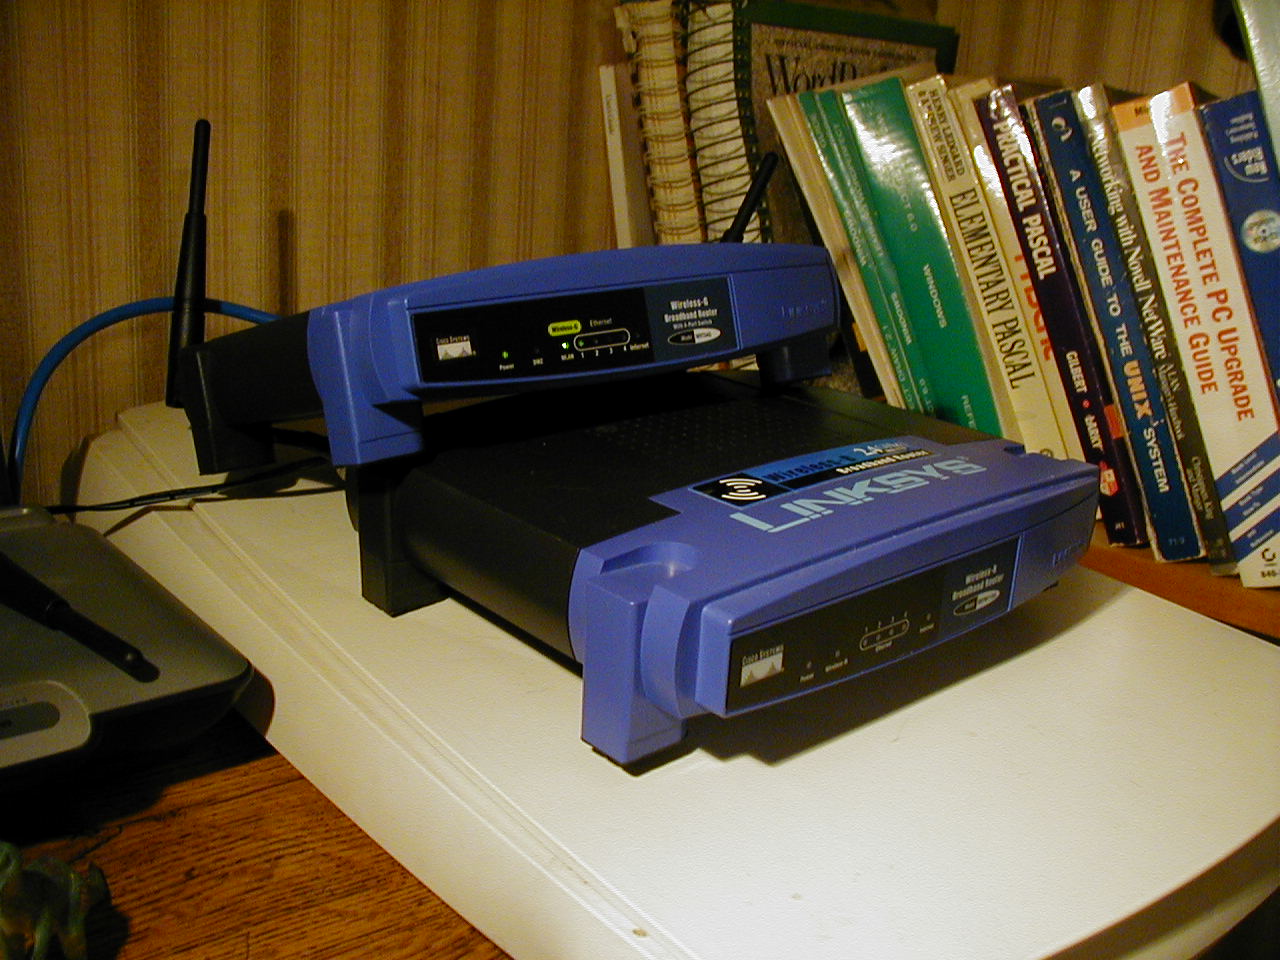
Great router, but even better with the DD-WRT firmware replacement. I tried a few other firmware replacements (like Freeman Basic) and finally settled on the DD-WRT. You can find a list of others at Linksysinfo.org.
Basically - it's a great router out of the box but a bunch of people found out that they could create their own LINUX-based firmware (the firmware is the operating system for the router). This firmware added many more features to the router, like the ability to increase it's power output, make it into a repeater and bridge, as well as many other features.
The process of replacing the existing firmware is easy, though it does come with it's own risks. Screwing up can 'brick' the router - render it dead, unusable. There are some methods for restoring it; some of them easy and some more involved, like shorting pins on a component inside, or using a JTAG cable and some software.
There is tab on the original firmware web-based interface to update the firmware. Linksys expected you to update with their own firmware of course, but it works for this after-market software just was well.
All you need to do is go to the DD-WRT site, download the correct firmware for your version of the router (it comes in a number of different versions), and upload it via the web interface to the router. Restart it and you're all set.
Unfortunately I ran into some troubles learning how to make it into a bridge and making it work with an older 802.11b Linksys router. I had a lot of work to do, plus we were having a large addition put on our house as well as all the projects that went with it. It took me quite some time to get back to working on the project. One of the most helpful messages was the one in this thread.
---
Entry #5 - "The Bridge - It works, now to tweak it"

I finally got it to work, thanks to lots of articles on the process and lots of experimenting. There was a thread on linksysinfo.org that was a great help but the link is no longer valid and I can't find the particular nor who wrote it. A good link from the DD-WRT WIKI on bridging, this one also explains it, though it pertains to different firmware.
You should be able to use pretty much anything as your main router, unlike where you use WDS - you don't need the same piece of hardware at each end. Just make note up your network settings on the main router, as well as it's SSID and channel.
Basically:
*Upload the firmware to the router you want to use as a bridge, reset the router, and make sure your computer is connected directly to the router. You probably should turn off any security on your main router until you have this all working correctly. It's best if you use Internet Explorer to do the following, and make sure your computer is plugged directly into the router you want to use as a bridge. Log into the router using the web-based interface.
*On the first tab, Setup; turn off STP and disable Internet connection Type. Scroll down and go to the Router IP and set this to something outside the range of the DHCP on your main router. If you main router is 192.168.5.1 and the DHCP range is 192.168.5.2 to 192.168.5.100 then set your bridge to something above 192.168.5.100. I also disabled DHCP on the bridge router.
*Go to the Wireless tab and make sure the router is on AP, and set it to the same SSID and channel as the main router.
*Go to the Security tab and turn off the firewall.
*Go to the Administration tab and turn on Telnet.
*Now reboot the router, you can do this on the admin screen.
*Go to your network settings on your computer and temporarily set the IP of your computer to something outside of the main router's DHCP but not the same as the one you assigned the router. Open a Telnet client, there should be on already on your computer.
*Type these lines, pausing a little after each one:
wl ap 0
wl wet 1
wl join SSID
nvram set rc_startup="wl ap 0;wl wet 1;wl join SSID
nvram commit
The first line turns off the AP mode that you set. This turns real bridge mode on, you've just saved yourself a lot of money and have an equivalent to a Linksys WET54. The third line joins you to the main router's SSID (make sure you put in the correct SSID here). The fourth and fifth lines save this info to the bridge router's memory (again, make sure you have the correct SSID in place). Once you get everything working you can add the WPA network key after each instance of SSID (I haven't tried this). The router should have connected to your main one at the third line so you should be all set.
*Now you can set your computer's IP back to assigned or whatever you had it set at before and you should be all set.
Follow these instructions, though I see on the recent version of DD-WRT (V23) you can click on the STATUS tab, then WIRELESS sub-tab, click the SURVEY button near the bottom, and it should pick up the main router (after following the above directions). Just click JOIN over on the right.
On my project the Linksys 802.11b router was the weak link. Over the distance I needed, the signal dropped enough for it to ramp down to a lower speed - I needed as much signal strength as possible to cut through potential hard rains, heavy snows, and other weather conditions that might decrease the signal further.
I could increase the power of the existing WRT54G in the settings for it, but I didn't want to increase it too much. Both because going too far might burn it out or decrease it's life, and the fact that increasing the power is only one-way; the router at the other end might receive better with a higher signal from this end but it's stillnot going to make my end receive any better...
Lots of great features in this firmware. You can even throttle some ports and applications so that they get more bandwidth priority over other things, under the QoS rules. Very nice. Also, an IP can be entered to prioritize certain computers, haven't tried this yet but sounds useful.
So I decided to get working on some antennas as well as picking up another WRT54G.
The first WRT54G was a version 3, maybe the best version they came out with?
Unfortunately I was still learning the in's and out's of the piece of equipment and waited too long to buy another - I got a version 5. Linksys, for whatever reason (which is debated) decided to give the version 5 a different OS (VXware) and less memory. Both of which severely limited customizing it. The DD-WRT software couldn't be uploaded and run on it, nor any other third-party firmware. And by the time I got done screwing around with trying and waiting for another version of formware to come out - it was too late to return it.
At some point someone did figure out how to do it, but with the help of a cable called a JTAG, which plugged into the router internally and used a modified version of the DD-WRT software. While it was certainly within my scope of abilities I felt that was a bit more time and resources then I wanted to put into it for the time-being.
But the V5 worked pretty well in it's stock form, anyway.
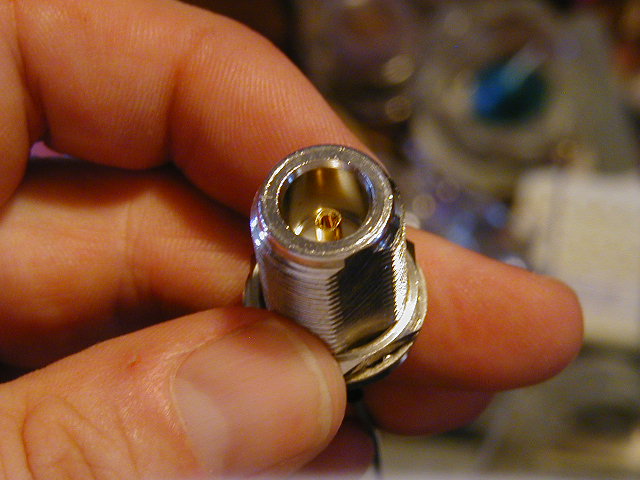
I set about making antennas. Which turned out to be a problem - not the making of them but getting that connectors. The N-connectors I needed to make the antennas couldn't be found around here and buying something for $5 online meant paying at least that much or more in shipping. Finally I found a couple good deals on eBay as well as on two pigtails. The pigtails had to be special ones, with the N-connector - needed to plug into the antennas - on one end, and a reverse TNC on the other. Why would Linksys put a reverse TNC on their routers instead of a standard one ? I don't know. Finally, I found a set for a fair price so now I had all the pieces - two N-connectors and two pigtails with matching N-connectors and reverse TNC on the other end. All I had to do was experiment with making the antennas.
Wow, a group of experimenters managed an un-amplified WI-FI connection of 125 miles! Click here and here.
---
Entry #6 - "Antennas and Other General Methods For Better Signal"
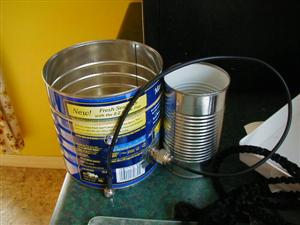 I had fun; I used coffee cans, bean cans, canned vegetable cans, and a satellite dish. Some baked bean cans seemed to work the best. Bush's I believe (the one on the right). A friend recently brought me a large dish for experimenting. Unfortunately, after checking it, it has no metallic surface so I will need to use a mesh on it. But it should be interesting.
Using the baked bean cans I can get an okay signal for the distance I need (while aiming the can antennas I even picked up someone else's wireless). But I need to play around with where to mount the N-connector in the cans as well as work on aiming. Good link with calculator for making your own tin can antennas.
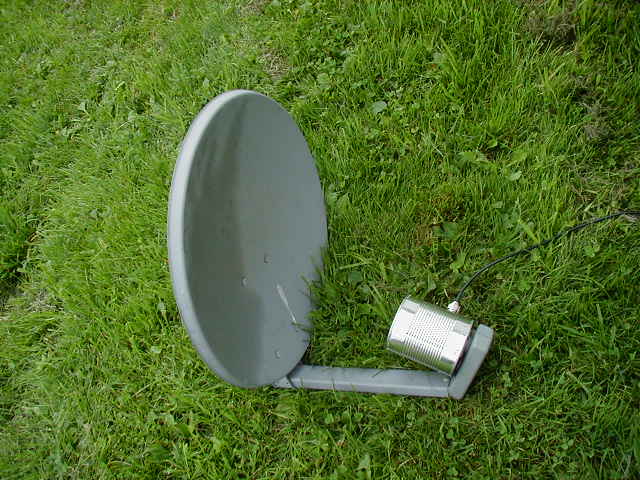
I set up a test computer at the other end with a webcam running, and get a consistent good signal. It took me awhile to figure things out and even longer to get the time to play around with the whole thing, but finally a good beginning success.
Here's the distance I need to cover, with a tin can antenna set up on a tripod. You can see the house in the distance if you look closely.
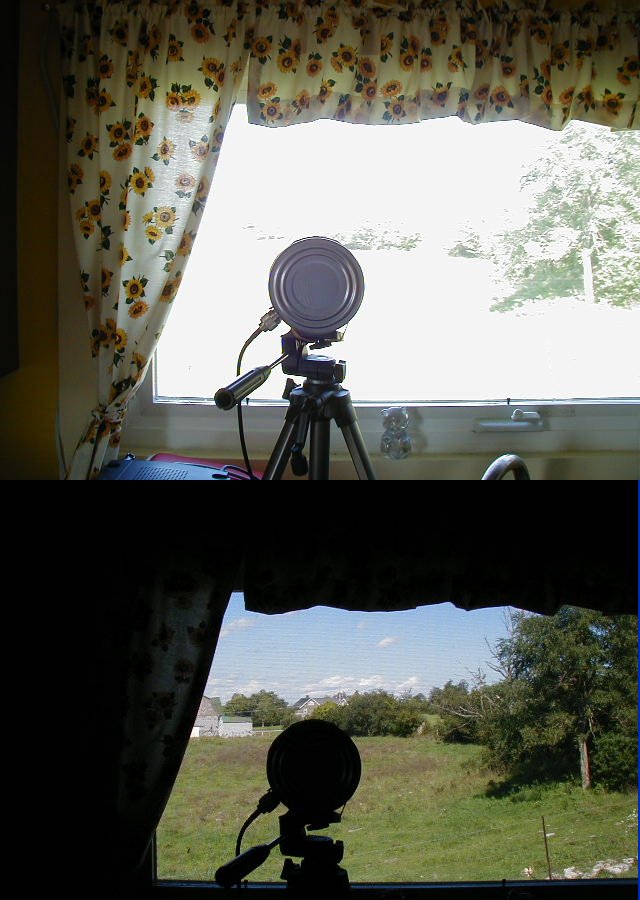
There's a number of other things you can do for a better signal, in general.
If you are using your router for trying to cover a particular area or location then you can try various temporary things like putting cookie sheets or something else with a reflective property behind the router (on the opposite side form where you want the signal to go) to reflect the signal. And/or by building these simple antenna reflectors - http://www.freeantennas.com/, the last three listed there. You just slide these over your existing router's antennas and sometimes can get about 10+% more signal in the direction the reflector is pointing, or even more. I have had really good results with these. If you're not good at "crafty" projects they might come out looking not-so-great, but they usually help either way.
In addition to making your own antennas like mine at the beginning of this entry, or the antenna reflectors from the above paragraph; you can go for a high performance 2.4GHz commercial antenna. But, of course, these can cost hundreds of dollars. And you can get the same or better performance by just making your own, for a fraction of the cost.
You can also just get online and buy a Cantenna, already made and with pigtails matching your router and sporting a snappy paint job. These are basically the Pringles can antennas that people make, prettied up and all ready to go. http://www.cantenna.com/
One thing to remember is that even though there are usually two antennas on your router, it is sampling them and picking the one with a best signal, or at least what it thinks is the best signal. So you can't replace one antenna with a directional antenna and leave the other omni-directional in place and expect to get the benefits of both - it's one or the other that the router will use. The DD-WRT firmware and some others let you select which antenna you want to use.
So anyway, the above methods you would only use if you needed an increase in strictly directional signals.
For omni-directional increase in coverage you can replace the stock antennas with somewhat better ones with higher gain. You can get these for $40 or $50, or even less on eBay. A few examples are near the bottom of this Linksys page. Just make sure that if you go this route you get one with the proper connector for your particular router. You can also finds plans on the Internet for making your own omni-directional antennas, but they're certainly less popular then directional ones. Here's plans for one.
With the DD-WRT firmware you can boost the power of the WRT54G router series, just don't go crazy with it and pump it to the max. Your router may overheat and be ruined, or you may decrease the overall life of it. Other routers may have this feature.
You can also get 'booster amps', but while these will amplify your signal they are also going to amplify any interference and noise too. Not to mention they'll cost more then you paid for your router, probably.
---
Entry #7 - "The WRT54G V5 firmware update"
Well, someone has finally done it and figured out how to update the WRT54G V5 without using the JTAG cable. Link here.
I haven't tried it as yet, let them work out the bugs a little first.
---
Entry #8 - "Adding another router to cover more of the home/office - Alternate Configuration is very useful"
Another computer tech seemed to be surprised that I was daisy-chaining routers together, not sure why. No cross-over cat5 is needed or anything, just plug 'em into each other. Daisy chained combos of wired and wireless together fine, had five in a row at one time when I was setting them up.
I have everything set up with static IP's and when I want to add a router I just give it another IP in the same network range, turn off DHCP. With a new addition to the house my old wireless router wasn't going through the walls well enough so I added one right below the floor in the new section of the house, water-proofed it in a sealed plastic bag (the router didn't seem to generate enough heat down there for the bag to stop the heat dissipation, the cellar is real cool all times of the year - but something I'm still checking just to make sure).
Now the rest of the house is covered as well as the back deck and yard. I have it on a switch so that it is only energized when I need it to be.
Alternate Configuration is very useful
This is useful if you regularly connect to different networks where one has static IP addresses assigned to each computer and others don't. Set it up under this tab and let Windows do the work for you, so you don't have to go in and switch it every time.
You can find Alternate Configuration by going to your Network connections and right-clicking on your wireless card, then selecting Properties. On the first tab (General) you'll see Internet Protocol TCP/IP listed, select this and then click Properties. On the next screen make sure Obtain an IP address automatically is selected and you should see the Alternate Configuration tab, click that and then User Configured and enter your static IP and other info here.
This works with Wireless Zero Configuration turned on so make sure that's all set up (with the various networks you are using set to automatically connect).
Once everything is set it should automatically discover and switch between static and automatic IP configuration depending on when it's needed.
---
Entry #9 - "A few interesting links"
Network research tools from Microsoft. Interesting.
---
Entry #10 - "WRT54G V5 DD-WRT Micro Firmware Burn Success"
Well, with fingers firmly crossed and after a look at the length of my warranty from Linksys - I just went ahead and followed the instructions for burning the DD-WRT Micro firmware.
One small SNAFU - after the VX_Killer upload I couldn't connect to the router...
I had to manually set the IP address of the computer to a fixed address, as it would not pick up a dynamic address from the router at this point, no matter what I did.
But once I did that I could use the TFTP program to upload the DD-WRT Micro firmware and everything worked fine after that.
The micro version seems to be feature-packed and has everything and more that I need.
3 comments:
---
Entry #11 - "Finally Found a 12 Inch Chinese Vegetable Strainer"

Finally found a 12 inch Chinese vegetable strainer for my next experimenting. Why do all the stores only sell 8 inch or below? Found a cheapo one at a dollar store in Syracuse.
Now where the hell is that Netgear USB device, still stuck in transit I guess...? It should be mountable right at the 'focus' of the strainer.

---
Entry #12 - "Some Testing with USB device, Satellite Dish, and Strainer"
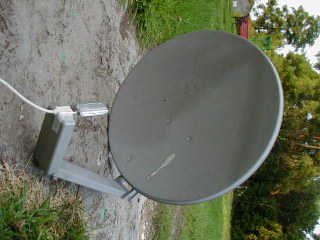
I finally received the MA111V2 (re-manufactured, and free shipping!) USB Netgear adapter from a company called JustDeals.com. So I grabbed a USB extension cable I had and packed the laptop up to take outside for some test.
The directivity on the strainer is neglible so far. I believe that it isn't a perfect parabola, for one thing, as the sides angle up too quickly to about 90 degrees. Still doing tests with it as I have to devise some way to mount the adapter in the middle of it, without using a Rube Goldbergian popsickle stick assortment and scotch tape...
Better results with the old Dish Network satellite dish. I cut the horn (LNB, the little roundish thing that sticks out intho the middle of the dish) off it and mounted the wireless adapter right there with some tape. A little screwing around with angles and such and I had a quick, down-and-dirty, probably-not-quite-at-the-focal-point mount for it.
Some good results and while testing it with my own wireless routers and Netstumbler I picked up some neighbor's wireless networks. And I'm not exactly close to any neighbors.
A quick check with the Windows' wireless software showed an okay passive signal strength for both receiving my own network and others nearby.
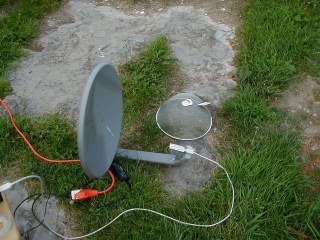
But on further testing with rotating the dish I get some strange results. Still testing. At right is the strainer, and the dish setup.
I have noticed that even without a reflector and with the USB extension cable plugged in the device picks up my home network better then any PCMCIA card. Definitely nice for getting more range for your own network, or for wardriving as you'd just hang the device from your rearview mirror for better reception, even without any other mods.
For those who are into wardriving you can download a version of LINUX made just for doing wireless surveys or wardriving or what-have-you - link.
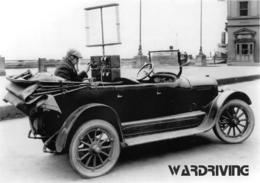
---
Entry #13 - "Wow, Geekalicious"
Check it out, you won't be sorry - http://www.smithstuff.net/steercan/Steercan.htm
Subscribe to:
Posts (Atom)
hey, can you tell me if you were able to set up wireless bridge w/ the v5 like you did below on earlier units, using the telnet commands 'wl ap 0' etc... I put on micro f/w, but was not able to get bridge in this way, like w/ prior uints.
hey, did you get the v5 to do wireless bridge using telnet commands below? I was not able to w/ the v5, but can w/ prior unit.
Response to anonymous...
I am using the WRT54G V3 that I have as the bridge unit itself, so while I did use the TELNET commands it was on the bridge - which was the V3 and not the V5. The V5, burned with the firmmware, worked fine as the main router for the bridge.